
Do you dream about having a magical garden? One that delights your eyes and awakens the child within, day or night? I know I do. It’s fun to fill your garden with little bits of fairyland, and revel in the joy it can inspire. And no magical garden would be complete without a set of shimmering mushroom lights.
Now, this little project won’t necessarily call fairies to your garden. They tend to prefer natural mysteries better than homemade ones, but it will send your mind wandering down to seek the far folk. If you want a garden that brings magic and mystery into your heart, read on! I’ll teach you how to make these adorable glowing mushrooms for a whimsical outdoor wonderland.

Glowing Mushroom Lights? What are Those?

Yes, glowing mushroom lights! Now that you’ve heard of them, a quick web search will show you about a dozen ways to go about making glowing toadstools. In fact, you’ll find options ranging from silicone and LED lights to resin versions painted with glow-in-the-dark paint. Each process produces a unique result, and while some are simple, some are very complex.
We’ll be taking a middle road here. Creating these will be a bit of a challenge, but not too hard. Our glowing mushrooms are made out of polymer clay and glow powder. As a result, they’re funky, utterly unique, and entirely accessible. In fact, you’re sure to create something amazing even if you’ve never worked with polymer clay before.
When we’re finished, you’ll have an adorable collection of glowing mushrooms to scatter in your garden. Try tucking them around your evening primrose or yarrow plants, beneath lilac trees, or among thyme and lavender. If you’ve tucked a few fairy houses in your garden, use these soft luminescents to light the path.
And if you have a children’s playhouse in your garden, as I do, these magical mushrooms will bring hours of evening joy to the children in your life.
Gathering Materials
You’ll need a few special supplies for this project.
Polymer Clay
Polymer clay is a synthetic medium made from plastics and resins. Unlike natural clay, you bake polymer clay in the oven to create a pretty durable end product. Natural clays need to be kiln-baked at a much higher temperature to last through time and weather. In contrast, polymer clay is easy to mould into various shapes. It comes is a huge variety of colors, but for this project, the more translucent it is, the better.
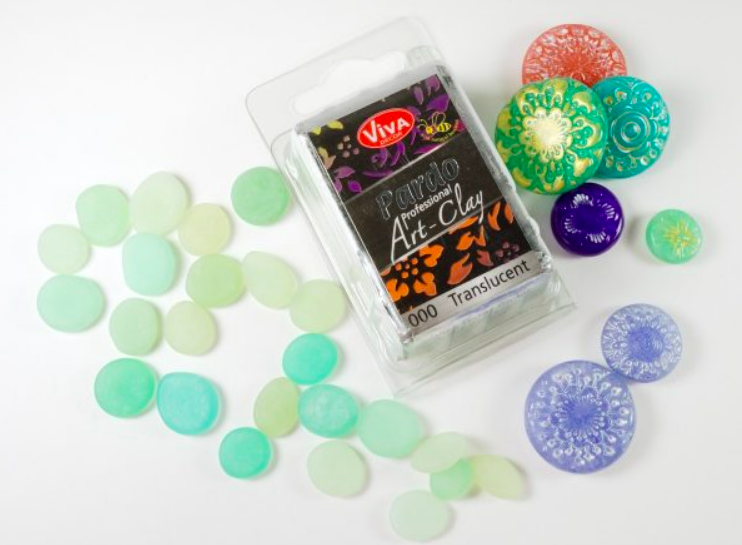
Since we’ll be adding in the glow powder, you’ll want a blank canvas. As such, be sure to pick a clear, white polymer clay variety. Pardo Translucent Art Clay is the clearest I’ve seen on the market.
There are glow-in-the-dark polymer clay varieties available as well. If you want your mushrooms to glow for any length of time, however, it’s best to mix your own. Unfortunately, commercial glow-in-the-dark clay only lights up the darkness for a short while. We want this beautiful lights glowing all evening long.
Glow-in-the-Dark Pigment Powder

These powders are fantastic. While there are a few options for glowing pigments, your best bet is to chose one made from strontium aluminate. Some phosphorescent products are made with Zinc sulfide, which doesn’t last as long or glow as strong as strontium aluminate.
You can find quality strontium aluminate powders by Art ‘n Glow or TechnoGlow. Pick a few different hues to make a variety of mushroom lights.
Clay Softener (optional)
Adding in a clay softener will restore the clay’s balance and elasticity. Remember, you’ll be adding powder to clay, and that will cause it to dry out a bit. Since we’re working with polymer, you can’t just balance it out with water either. A clay softener will keep your clay soft and workable even as you work in the glow powder.
Driftwood, Birch Logs, and Other Mushroom Homes
Your mushrooms will need a home. Don’t just tuck them into the dirt, or they might get buried. Give them a solid foundation by setting them up on a small log or stone.
If you’re using wood as the base for your mushrooms, try drilling a hole the size of the mushroom stem in the log as a niche for your little light to sit in. If you’d rather set your mushrooms on a stone, try using a bit of glue on the base of the stem to keep those mushrooms in place.
Mixing the Clay
Now that we have everything together, let’s get started.
First, we have to mix the clay. So, pull out your clear polymer clay, your clay softener, and your glow powder.
If at all possible, work on a ceramic counter top or a glass cutting board. It’s important to avoid working an unsealed wooden counter or tabletop to avoid drying the clay out too quickly. After all, wood absorbs moisture, and you want to keep this clay moist and supple for a long while.
Roll your clay out into a thin sheet: about 1/6” is perfect.
Spread a very light layer of clay softener on top of the clay. Think of it as butter on bread—a little goes a long way. You only want the thinnest layer of softener to keep the clay workable.
Now, top this little slice of clay with glow powder. Sprinkle the powder all over the clay and spread it around. You’ll need about 1 teaspoon for a 2oz block of clay, or 1/2 a teaspoon for 1oz of clay.
Next, roll it up like stromboli and start kneading the clay like bread dough. Powder will fall out, but keep kneading on top of the spill. It’ll all incorporate eventually, so just keep working patiently. When the powder and softener are all kneaded into the clay, you’ll have a smooth ball of it ready to shape.
Shaping the Mushrooms
Now that we have our glow-clay all mixed up, we can start shaping our mini mushroom lights. Sizing it totally up to you, but I suggest building a variety of shapes and sizes. Mushrooms aren’t one size fits all, especially magical fairy mushrooms.
The Stem
Anywhere from 1-5 inches in height is ideal. You may want to add a few taller, spindly mushrooms as well to give an Alice in Wonderland feel to the garden. Start by rolling the stem. Many mushrooms have a wide base and a narrow tip, but some have an hourglass stem instead.
Roll a few short, squat toadstool stalks to get the feel of things. I like to roll clay with my hands, as it seems to give more control. After you’ve rolled a stem slightly longer than you need, smack one end against the table to give a flat base. This also gives you that slumpy, mushroom stalk look.
At this point, your stem should be able to stand upright on the table.
The Cap
Grab the rolling pin for this. Now take a ball of clay and flatten it with your hand against the table. With the rolling pin, rolling it out into an imperfect circle.
If you don’t have a rolling pin, just pinch out the flattened ball. Remember making pinch pots in 2nd grade? Just like that. In fact, making pinch pot caps is a great way to get comfortable shaping these polymer mushroom lights.
Every mushroom cap is different. If you want to make toadstool caps, you’ll want to keep the cap thicker and knobbly. Slender fairy-cap mushrooms will need very thinly rolled clay, twisted and folded. Have a mycology book, or a Fairy Book open beside you as you work for guidance. But trust your inner artist as well.
Finishing Touches
If your mushrooms are full of fingerprints, or if they’re just a little too knobbly for your taste, try dipping a paintbrush in rubbing alcohol and gently brushing it along the clay. This will smooth all the undesired textures away. Just make sure to let the alcohol evaporate before baking.
You can also add texture with a fork, a comb, or clay tools. Add in some ridges or carve some spirals into your mushrooms. Then, pop them into the oven at about 150 degrees for 40-60 minutes. Slow baking on low heat is best for polymer clay, in order to prevent cracking.
Setting the Stage

Now that your mushrooms are complete, set them on the base you’ve chosen, and bring them into the garden. If you’ll be gluing them into place, super glue or wood glue are the best options.
To get the most out of the glow powder, set these mushrooms up in a garden spot where they’ll get plenty of sunlight. Glow-in-the-dark pieces work by absorbing light and slowly releasing it after the sun goes down. The more sunlight your mushrooms get, the longer they’ll be able to light up your garden at night.
Tuck these mushroom lights around sun-loving flowers, along pathways, and in sunny patches in the yard. If you’re hoping to build a fairyland all your own, add the mushrooms to fairy trees like birches and elder bushes.
Wherever you plant them, these gorgeous, glowing mushrooms are sure to bring magic into your space.